")

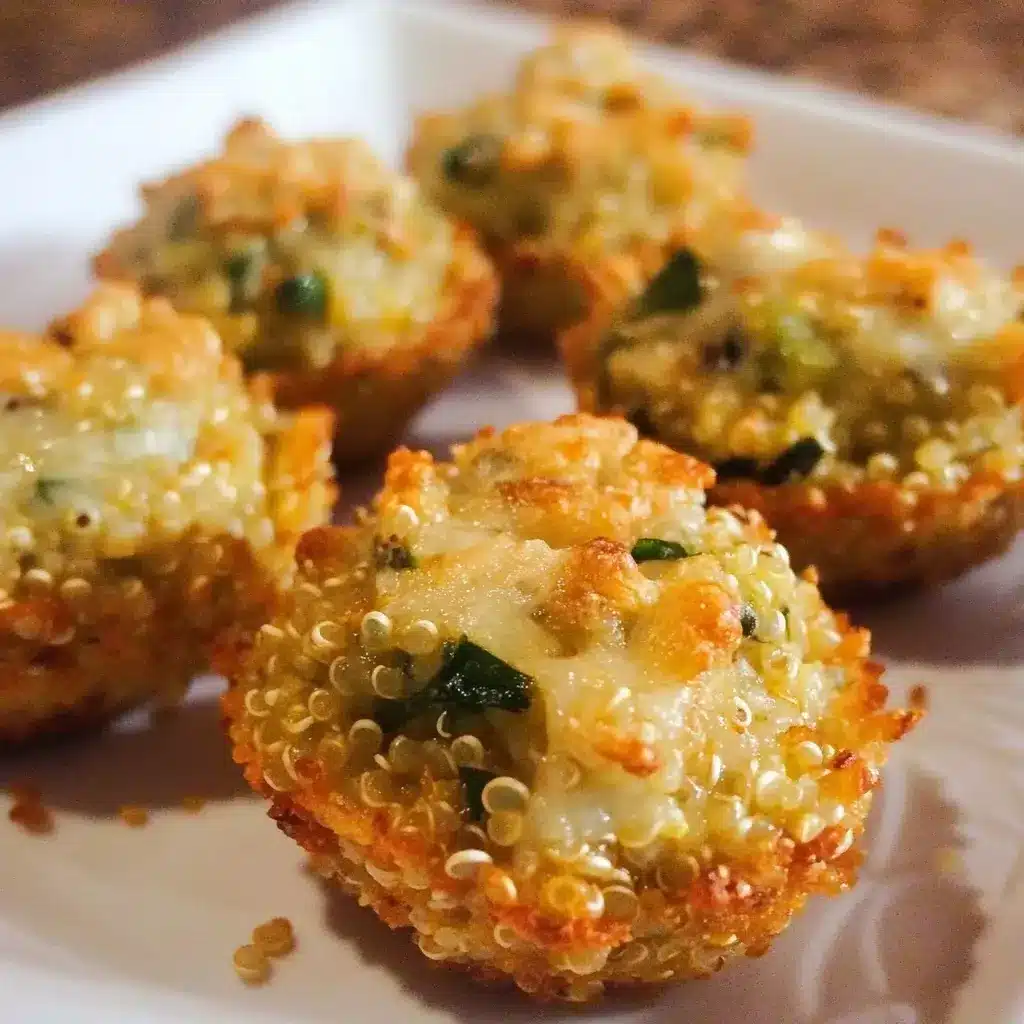
It’s funny how sometimes the simplest recipes become the biggest hits. I’d been looking for a new way to use up some leftover quinoa, and frankly, my family was getting a bit tired of the usual quinoa salads. I stumbled upon the idea of a “popper” and thought, “Why not?” The first batch I made of these Cheesy Quinoa Poppers was… experimental. A bit too crumbly, a tad bland. But the potential was there. After a few tweaks – more cheese (always a good idea!), the right blend of seasonings, and perfecting the baking time for that golden, crispy crust – they became an absolute sensation. My kids, who usually eye quinoa with suspicion, now ask for “those cheesy balls” specifically. They’re a go-to for movie nights, a surprise hit at potlucks, and honestly, sometimes I make a batch just for myself as a savory, satisfying snack. The combination of the slightly nutty quinoa, the gooey, melted cheese, and the crispy exterior is just plain addictive. Plus, knowing they pack a good punch of protein makes me feel a little less guilty about devouring half a dozen in one sitting! They truly are a testament to how a humble grain can be transformed into something incredibly delicious and crowd-pleasing.
Ingredients
Here’s what you’ll need to create these irresistible Cheesy Quinoa Poppers:
- 1 ½ cups cooked quinoa, cooled: This is the star of our poppers, providing a lovely texture and a good dose of protein. Ensure it’s cooled to prevent the poppers from being too mushy.
- 1 large egg, lightly beaten: This acts as our primary binder, helping to hold all the delicious ingredients together.
- ¾ cup shredded sharp cheddar cheese: Provides that classic cheesy flavor and beautiful melt. You can substitute with Monterey Jack or a Mexican blend if preferred.
- ¼ cup grated Parmesan cheese: Adds a salty, nutty depth of flavor that complements the cheddar wonderfully.
- ⅓ cup Panko breadcrumbs (plus extra for coating, about ½ cup): Panko breadcrumbs give a lighter, crispier texture than regular breadcrumbs. We’ll use some in the mixture and some for the outer coating.
- 2 tablespoons finely chopped fresh chives or green onions: Lends a mild, fresh oniony bite that brightens up the flavor.
- 1 tablespoon all-purpose flour (or gluten-free all-purpose blend): Helps to bind the mixture further and absorb any excess moisture.
- ½ teaspoon garlic powder: A versatile aromatic that adds a savory kick.
- ¼ teaspoon onion powder: Complements the garlic powder for a well-rounded savory base.
- ¼ teaspoon smoked paprika (optional, but recommended): Adds a subtle smokiness and beautiful color.
- Salt and freshly ground black pepper to taste: Essential for enhancing all the other flavors. Start with about ¼ teaspoon of salt and ⅛ teaspoon of pepper, then adjust.
- Olive oil spray or a little olive oil for greasing: To prevent sticking and help achieve a golden-brown crust.
Instructions
Follow these simple steps to create your delicious Cheesy Quinoa Poppers:
- Preheat and Prepare: Preheat your oven to 400°F (200°C). Lightly grease a baking sheet with olive oil spray or a thin layer of olive oil, or line it with parchment paper for easy cleanup.
- Combine Wet and Dry Ingredients (Initial Mix): In a large mixing bowl, combine the cooled cooked quinoa, beaten egg, shredded cheddar cheese, grated Parmesan cheese, ⅓ cup of Panko breadcrumbs, finely chopped chives (or green onions), all-purpose flour, garlic powder, onion powder, and smoked paprika (if using).
- Season: Season the mixture with salt and freshly ground black pepper. Mix everything thoroughly with a spoon or your hands until well combined. The mixture should be moist enough to hold its shape but not overly wet. If it feels too wet, you can add a tiny bit more flour or Panko breadcrumbs, one teaspoon at a time.
- Chill (Optional but Recommended): For easier handling and to prevent the poppers from spreading too much, cover the bowl and chill the mixture in the refrigerator for at least 15-30 minutes. This step helps the ingredients bind together better.
- Shape the Poppers: Place the extra Panko breadcrumbs (about ½ cup) in a shallow dish or on a plate. Take about 1 to 1.5 tablespoons of the quinoa mixture and roll it between your palms to form a small ball or a slightly flattened patty (popper shape).
- Coat the Poppers: Gently roll each popper in the extra Panko breadcrumbs, ensuring it’s evenly coated on all sides. This will give them a wonderfully crispy exterior. Place the coated poppers on the prepared baking sheet, leaving a little space between each one.
- Bake: Bake in the preheated oven for 18-22 minutes, flipping them halfway through (around the 9-11 minute mark). Bake until they are golden brown, crispy on the outside, and heated through. The cheese should be nicely melted.
- Cool Slightly and Serve: Once baked, remove the poppers from the oven and let them cool on the baking sheet for a few minutes. They will be very hot inside! This slight cooling also helps them firm up a bit more. Serve warm with your favorite dipping sauce.
Nutrition Facts
- Servings: This recipe makes approximately 18-24 poppers, serving about 6 people (3-4 poppers per person).
- Calories per serving (approx. 4 poppers): Around 180-220 calories.
- Protein: Approximately 8-10g per serving. Quinoa and cheese are excellent sources of protein, making these poppers a satisfying snack.
- Fiber: Approximately 2-3g per serving. Quinoa is a good source of dietary fiber, beneficial for digestion.
- Fat: Approximately 9-12g per serving, primarily from the cheese and any oil used. Using part-skim cheese can reduce this slightly.
(Note: Nutritional values are estimates and can vary based on specific ingredients and portion sizes.)
Preparation Time
- Active Preparation Time: Approximately 20-25 minutes (this includes mixing and shaping the poppers).
- Chilling Time (Optional): 15-30 minutes.
- Cooking Time: 18-22 minutes.
- Total Time (including optional chilling): Approximately 53-77 minutes.
These Cheesy Quinoa Poppers come together relatively quickly, especially if you have pre-cooked quinoa on hand. The chilling step is optional but highly recommended for the best texture and ease of handling.
How to Serve
These Cheesy Quinoa Poppers are wonderfully versatile. Here are some delightful ways to serve them:
- As an Appetizer:
- Arrange them on a platter with a variety of dipping sauces in the center.
- Garnish with extra fresh chives or a sprinkle of paprika for visual appeal.
- Perfect for parties, game days, or casual get-togethers.
- With Dipping Sauces: They are begging to be dipped! Try:
- Classic Marinara Sauce: The acidity cuts through the richness of the cheese.
- Spicy Aioli: Mayonnaise mixed with sriracha or chili garlic sauce and a squeeze of lime.
- Ranch Dressing: A cool and creamy contrast.
- Honey Mustard: A sweet and tangy option that kids often love.
- Sweet Chili Sauce: For a touch of Asian-inspired flavor.
- Garlic Yogurt Dip: Plain Greek yogurt mixed with minced garlic, lemon juice, and a pinch of salt.
- As a Light Lunch or Snack:
- Serve a few poppers alongside a fresh green salad for a balanced light meal.
- Pack them in lunchboxes (they are good at room temperature too, though best warm).
- For Kids:
- Their small, bite-sized nature makes them very kid-friendly.
- Serve with ketchup or their favorite mild dip.
- As a Side Dish:
- They can accompany a simple soup or a grilled chicken breast for added texture and flavor.
- Creative Twists:
- Crumble a few cooled poppers over a salad for a cheesy, crunchy topping.
- Use them as a filling for a vegetarian wrap with some fresh veggies and sauce.
Additional Tips
Unlock the full potential of your Cheesy Quinoa Poppers with these eight handy tips:
- Ensure Quinoa is Properly Cooled: Using hot or warm quinoa can make the mixture too sticky and difficult to handle. It can also cause the cheese to melt prematurely. Let your cooked quinoa cool completely, or even chill it, before mixing. This is key for poppers that hold their shape.
- Don’t Overcrowd the Baking Sheet: Give your poppers enough space on the baking sheet. Overcrowding will cause them to steam rather than crisp up, resulting in a soggier texture. Bake in batches if necessary.
- Fine-Tune Your Cheese Blend: While sharp cheddar is fantastic, feel free to experiment! A mix of Monterey Jack for meltiness and Pepper Jack for a kick can be delicious. Gruyère or smoked Gouda can add a sophisticated touch. Just ensure it’s a good melting cheese.
- Spice it Up (or Down): Adjust the seasonings to your preference. Add a pinch of cayenne pepper or red pepper flakes for some heat. For a more herbaceous note, try incorporating dried oregano, thyme, or Italian seasoning.
- Make Them Gluten-Free Easily: To make these poppers gluten-free, simply ensure your Panko breadcrumbs are certified gluten-free and use a gluten-free all-purpose flour blend in place of regular flour. Quinoa is naturally gluten-free.
- Get the Kids Involved: This is a great recipe for little helpers! Kids can assist with measuring ingredients, mixing (with supervision), and rolling the poppers in breadcrumbs. It’s a fun way to get them interested in cooking and trying new foods.
- Freeze for Future Feasting: These Cheesy Quinoa Poppers are wonderfully freezer-friendly, making them a perfect make-ahead solution for busy weeknights or impromptu gatherings. To freeze, allow the baked poppers to cool completely on a wire rack. Then, arrange them in a single layer on a baking sheet lined with parchment paper and flash-freeze for about 1-2 hours, or until solid. Once frozen, transfer the poppers to an airtight freezer bag or container, removing as much air as possible. They can be stored in the freezer for up to 3 months. When ready to enjoy, you can reheat them directly from frozen in a preheated oven at 375°F (190°C) for 15-20 minutes, or until heated through and crispy again.
- Air Fryer Option: For an even crispier result, or if you prefer not to use your oven, these poppers can be made in an air fryer. Preheat your air fryer to 375°F (190°C). Arrange the poppers in a single layer in the air fryer basket (you may need to do this in batches). Spray them lightly with oil. Air fry for 8-12 minutes, flipping halfway, until golden brown and crispy. Keep an eye on them as air fryer cooking times can vary.
FAQ Section
Here are answers to some frequently asked questions about Cheesy Quinoa Poppers:
Q1: Can I make these Cheesy Quinoa Poppers vegan?
A1: Yes, with a few substitutions! Use a vegan cheese alternative that melts well (there are many good shredded vegan cheddars available). For the egg, you can try a flax egg (1 tablespoon ground flaxseed mixed with 3 tablespoons water, let sit for 5 minutes) or a commercial vegan egg replacer. Ensure your Panko breadcrumbs are vegan (most are, but check labels).
Q2: My poppers are falling apart. What did I do wrong?
A2: This usually happens if the mixture is too wet or not bound sufficiently. Ensure your quinoa is well-drained and cooled. The egg and flour are crucial binders. If the mixture still feels too loose, try adding a bit more Panko breadcrumbs or flour (one tablespoon at a time) until it holds its shape better when rolled. Chilling the mixture before shaping, as recommended, also significantly helps them hold together.
Q3: Can I use a different grain instead of quinoa?
A3: While quinoa provides a unique texture and nutritional profile, you could experiment with other cooked and cooled grains. Cooked millet or even leftover cooked brown rice (finely chopped if the grains are very large) might work, but the texture and binding properties will differ. You may need to adjust the amount of binder (egg, flour) accordingly.
Q4: How do I store leftover Cheesy Quinoa Poppers?
A4: Allow leftover poppers to cool completely. Store them in an airtight container in the refrigerator for up to 3-4 days. For longer storage, freezing is the best option (see tip #7 above).
Q5: What’s the best way to reheat the poppers to keep them crispy?
A5: The oven or an air fryer is best for reheating. Preheat your oven to 350°F (175°C) and bake for 8-10 minutes, or until heated through and crispy. In an air fryer, reheat at 350°F (175°C) for 3-5 minutes. Microwaving will make them soft, so it’s not ideal if you want to retain crispiness.
Q6: Are these poppers spicy? My kids don’t like spicy food.
A6: As written, this recipe is not spicy. The smoked paprika adds a smoky flavor, not heat. If you want to ensure no spiciness, you can omit the smoked paprika or use sweet paprika instead. If you do want a kick, you can add a pinch of cayenne pepper or finely minced jalapeño.
Q7: Can I prepare the mixture ahead of time?
A7: Yes, you can prepare the quinoa mixture (up to step 3 of the instructions), cover it tightly, and refrigerate it for up to 24 hours. When you’re ready to bake, proceed with shaping, coating, and baking the poppers. This can be a great time-saver for party prep.
Q8: My quinoa is always mushy. Any tips for cooking perfect quinoa for this recipe?
A8: For fluffy, not mushy, quinoa:
* Rinse well: Rinse your quinoa under cold water for at least 30 seconds to remove saponins, which can cause a bitter taste.
* Use the right ratio: Generally, use a 1:2 ratio of quinoa to liquid (e.g., 1 cup quinoa to 2 cups water or broth).
* Simmer, don’t boil hard: Bring the liquid to a boil, add quinoa, then reduce heat to low, cover, and simmer for about 15 minutes, or until all liquid is absorbed.
* Rest: Once cooked, remove from heat and let it sit, covered, for at least 5 minutes.
* Fluff: Fluff with a fork. For this recipe, spreading the cooked quinoa on a baking sheet to cool and dry out a bit can also help prevent excess moisture.

Cheesy Quinoa Poppers
Ingredients
Here’s what you’ll need to create these irresistible Cheesy Quinoa Poppers:
- 1 ½ cups cooked quinoa, cooled: This is the star of our poppers, providing a lovely texture and a good dose of protein. Ensure it’s cooled to prevent the poppers from being too mushy.
- 1 large egg, lightly beaten: This acts as our primary binder, helping to hold all the delicious ingredients together.
- ¾ cup shredded sharp cheddar cheese: Provides that classic cheesy flavor and beautiful melt. You can substitute with Monterey Jack or a Mexican blend if preferred.
- ¼ cup grated Parmesan cheese: Adds a salty, nutty depth of flavor that complements the cheddar wonderfully.
- ⅓ cup Panko breadcrumbs (plus extra for coating, about ½ cup): Panko breadcrumbs give a lighter, crispier texture than regular breadcrumbs. We’ll use some in the mixture and some for the outer coating.
- 2 tablespoons finely chopped fresh chives or green onions: Lends a mild, fresh oniony bite that brightens up the flavor.
- 1 tablespoon all-purpose flour (or gluten-free all-purpose blend): Helps to bind the mixture further and absorb any excess moisture.
- ½ teaspoon garlic powder: A versatile aromatic that adds a savory kick.
- ¼ teaspoon onion powder: Complements the garlic powder for a well-rounded savory base.
- ¼ teaspoon smoked paprika (optional, but recommended): Adds a subtle smokiness and beautiful color.
- Salt and freshly ground black pepper to taste: Essential for enhancing all the other flavors. Start with about ¼ teaspoon of salt and ⅛ teaspoon of pepper, then adjust.
- Olive oil spray or a little olive oil for greasing: To prevent sticking and help achieve a golden-brown crust.
Instructions
Follow these simple steps to create your delicious Cheesy Quinoa Poppers:
- Preheat and Prepare: Preheat your oven to 400°F (200°C). Lightly grease a baking sheet with olive oil spray or a thin layer of olive oil, or line it with parchment paper for easy cleanup.
- Combine Wet and Dry Ingredients (Initial Mix): In a large mixing bowl, combine the cooled cooked quinoa, beaten egg, shredded cheddar cheese, grated Parmesan cheese, ⅓ cup of Panko breadcrumbs, finely chopped chives (or green onions), all-purpose flour, garlic powder, onion powder, and smoked paprika (if using).
- Season: Season the mixture with salt and freshly ground black pepper. Mix everything thoroughly with a spoon or your hands until well combined. The mixture should be moist enough to hold its shape but not overly wet. If it feels too wet, you can add a tiny bit more flour or Panko breadcrumbs, one teaspoon at a time.
- Chill (Optional but Recommended): For easier handling and to prevent the poppers from spreading too much, cover the bowl and chill the mixture in the refrigerator for at least 15-30 minutes. This step helps the ingredients bind together better.
- Shape the Poppers: Place the extra Panko breadcrumbs (about ½ cup) in a shallow dish or on a plate. Take about 1 to 1.5 tablespoons of the quinoa mixture and roll it between your palms to form a small ball or a slightly flattened patty (popper shape).
- Coat the Poppers: Gently roll each popper in the extra Panko breadcrumbs, ensuring it’s evenly coated on all sides. This will give them a wonderfully crispy exterior. Place the coated poppers on the prepared baking sheet, leaving a little space between each one.
- Bake: Bake in the preheated oven for 18-22 minutes, flipping them halfway through (around the 9-11 minute mark). Bake until they are golden brown, crispy on the outside, and heated through. The cheese should be nicely melted.
- Cool Slightly and Serve: Once baked, remove the poppers from the oven and let them cool on the baking sheet for a few minutes. They will be very hot inside! This slight cooling also helps them firm up a bit more. Serve warm with your favorite dipping sauce.
Nutrition
- Serving Size: one normal portion
- Calories: 220
- Fat: 12g
- Fiber: 3g
- Protein: 10g