")

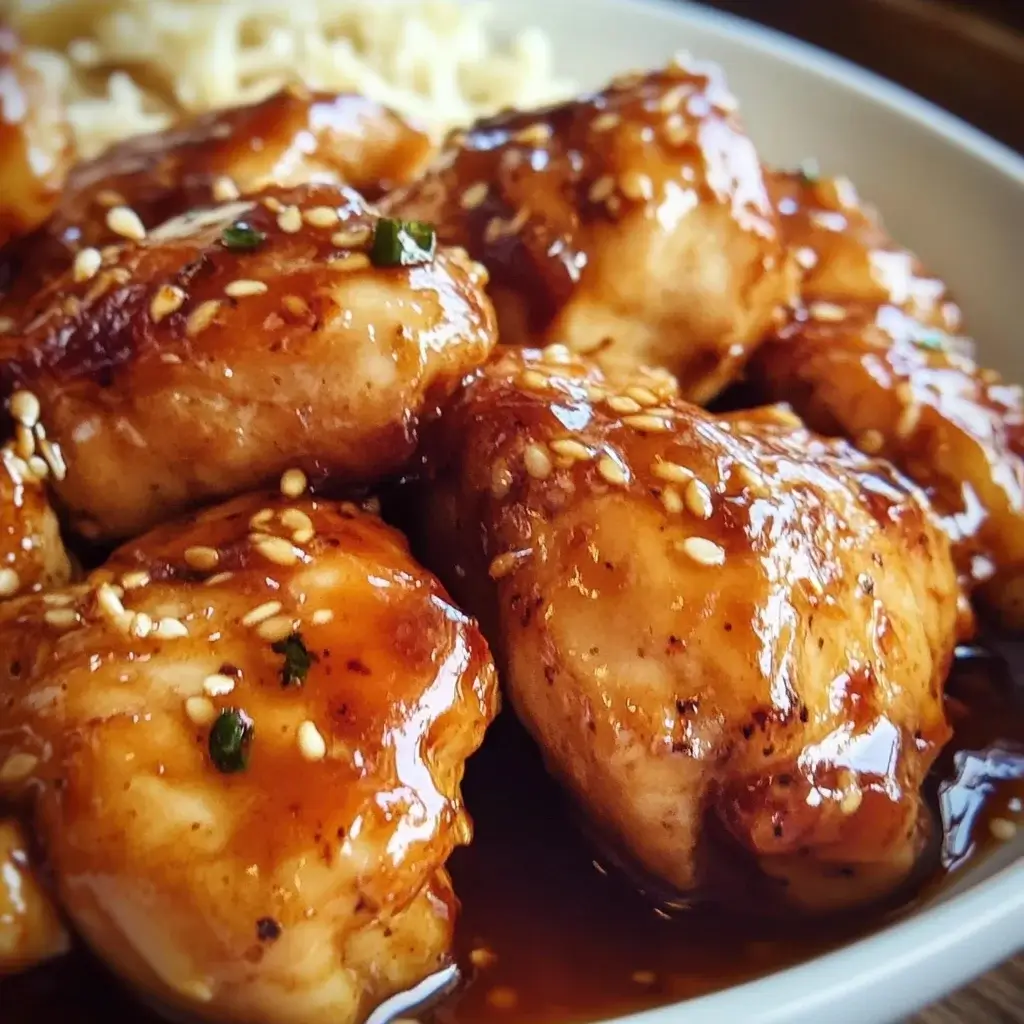
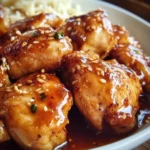
Let me tell you, finding a dinner recipe that gets a unanimous thumbs-up from my entire family is like striking gold. For the longest time, weeknight dinners were a rotation of predictable (and sometimes met with sighs) meals. Then came the Sweet & Sticky Honey Garlic Chicken. The first time I made it, the aroma alone had everyone migrating to the kitchen, asking “What smells SO good?”. That evening, plates were cleaned faster than ever before. My notoriously picky youngest, who usually eyes chicken with suspicion, actually asked for seconds. My husband declared it “restaurant-quality,” and honestly, I had to agree. It hits that perfect trifecta: incredibly flavorful with that addictive sweet, savory, garlicky glaze; surprisingly easy to whip up even on a busy Tuesday; and versatile enough to please everyone. The chicken comes out tender and juicy, coated in a luscious, sticky sauce that clings beautifully. It’s transformed our dinner routine, becoming a requested favorite that genuinely brings smiles to the table. It’s more than just a recipe; it’s become one of our go-to comfort meals, a guaranteed crowd-pleaser that makes me feel like a kitchen hero with minimal effort. If you’re looking for that next standout dish, trust me, this is the one.
Ingredients
Here’s what you’ll need to create this irresistible honey garlic chicken:
- 1.5 lbs (about 680g) Boneless, Skinless Chicken Thighs: Cut into 1-inch bite-sized pieces. Thighs stay incredibly juicy and flavorful, perfect for this recipe. You can use chicken breasts, but thighs are recommended for tenderness.
- 2 Tablespoons Cornstarch (or Arrowroot Powder): For coating the chicken, creating a light crust that helps the sauce cling and adds a slight crispness.
- 1 Teaspoon Salt: Or to taste. Essential for seasoning the chicken properly.
- 1/2 Teaspoon Black Pepper: Freshly ground preferred for the best flavor.
- 2 Tablespoons Olive Oil (or Avocado Oil): For searing the chicken. Choose a neutral oil with a relatively high smoke point.
- 6-8 Cloves Garlic: Minced finely. Don’t skimp here; it’s key to the “garlic” part of honey garlic! Adjust based on your love for garlic.
- 1/2 Cup Honey: The star sweetener, providing that characteristic sticky sweetness. Use good quality liquid honey.
- 1/3 Cup Low-Sodium Soy Sauce (or Tamari for Gluten-Free): Provides the savory, umami base for the sauce. Low-sodium helps control the saltiness.
- 2 Tablespoons Rice Vinegar (or Apple Cider Vinegar): Adds a crucial tanginess to balance the sweetness of the honey and richness of the soy sauce.
- 1 Tablespoon Sesame Oil: Toasted sesame oil adds a wonderful nutty depth to the sauce. A little goes a long way.
- 1 Teaspoon Grated Fresh Ginger (Optional but Recommended): Adds a warm, zesty kick that complements the garlic beautifully.
- 1/4 Teaspoon Red Pepper Flakes (Optional): For a gentle background heat. Adjust to your spice preference or omit entirely.
- 1 Tablespoon Cornstarch (or Arrowroot Powder) mixed with 2 Tablespoons Water: This slurry is used to thicken the sauce to that perfect sticky consistency.
- Optional Garnishes: Toasted sesame seeds and thinly sliced green onions (scallions). These add visual appeal, texture, and fresh flavor.
Instructions
Follow these steps for perfectly sweet, sticky, and savory honey garlic chicken:
- Prepare the Chicken: Pat the cut chicken thigh pieces thoroughly dry with paper towels. This is crucial for getting a good sear. In a medium bowl, toss the chicken pieces with 2 tablespoons of cornstarch, 1 teaspoon of salt, and 1/2 teaspoon of black pepper until evenly coated. The cornstarch coating helps create a slightly crispy exterior and thickens the sauce later.
- Sear the Chicken: Heat the olive oil in a large skillet or wok over medium-high heat. Once the oil is shimmering hot (but not smoking), carefully add the coated chicken pieces in a single layer. Avoid overcrowding the pan; cook in batches if necessary. Cook for 3-5 minutes per side, undisturbed, until golden brown and cooked through. The internal temperature should reach 165°F (74°C). Once cooked, remove the chicken from the skillet and set it aside on a plate. Don’t clean the skillet yet – those browned bits add flavor!
- Sauté Aromatics: Reduce the heat to medium. Add the minced garlic (and grated ginger, if using) to the same skillet. Sauté for about 30-60 seconds until fragrant. Be very careful not to burn the garlic, as it will turn bitter. Stir constantly.
- Create the Sauce Base: Pour the honey, low-sodium soy sauce, rice vinegar, and sesame oil into the skillet. Add the red pepper flakes, if using. Whisk everything together, scraping up any browned bits (fond) from the bottom of the pan – this adds immense flavor to the sauce.
- Simmer the Sauce: Bring the sauce mixture to a gentle simmer over medium heat. Let it bubble gently for 2-3 minutes, allowing the flavors to meld together.
- Thicken the Sauce: In a small bowl, whisk together the remaining 1 tablespoon of cornstarch and 2 tablespoons of water until smooth, creating a slurry. Pour the slurry into the simmering sauce while whisking constantly. Continue to cook and whisk for another 1-2 minutes, or until the sauce has thickened to a syrupy, glossy consistency that coats the back of a spoon. It should be visibly sticky.
- Combine Chicken and Sauce: Return the cooked chicken pieces (and any accumulated juices from the plate) back to the skillet with the thickened sauce. Toss gently to coat every piece thoroughly in the glorious honey garlic glaze. Let it simmer for another minute or two, allowing the chicken to reheat and fully absorb the sauce’s flavor.
- Serve: Remove the skillet from the heat. Your Sweet & Sticky Honey Garlic Chicken is ready! Garnish generously with toasted sesame seeds and sliced green onions, if desired, before serving immediately.
Nutrition Facts
- Servings: Approximately 4 servings
- Calories per Serving: Roughly 450-550 kcal (This is an estimate and can vary significantly based on specific ingredients used, particularly the amount of oil and honey, and the cut of chicken.)
- Protein: Approximately 35-40g. Primarily from the chicken, essential for muscle building and repair, and contributes to satiety.
- Carbohydrates: Approximately 30-40g. Mainly from the honey and cornstarch, providing energy. A significant portion of this is sugars from the honey.
- Fat: Approximately 20-25g. Comes from the chicken thighs and cooking oil. Using leaner chicken breasts would reduce this.
- Sodium: Approximately 800-1000mg. Largely from the soy sauce. Using low-sodium soy sauce helps manage this, but it remains a significant source.
- Sugar: Approximately 20-25g. Primarily from the honey. This contributes significantly to the calorie count and the recipe’s characteristic sweetness.
Disclaimer: Nutritional information is an estimate only, calculated using standard databases. Actual values may vary based on specific ingredients, brands, portion sizes, and preparation methods.
Preparation Time
- Total Time: Approximately 30-35 minutes
- Prep Time: 10-15 minutes (Includes cutting the chicken, measuring ingredients, mincing garlic/ginger, and mixing the cornstarch coating and slurry).
- Cook Time: 20 minutes (Includes searing the chicken in batches if needed, sautéing aromatics, simmering and thickening the sauce, and combining everything). This quick turnaround makes it an excellent option for busy weeknights.
How to Serve
This Sweet & Sticky Honey Garlic Chicken is incredibly versatile. Here are some fantastic ways to serve it, ensuring you soak up every last drop of that delicious sauce:
- Classic Comfort:
- Serve hot over a bed of fluffy steamed white rice (like Jasmine or Basmati). The rice is the perfect neutral canvas to absorb the rich, flavorful sauce.
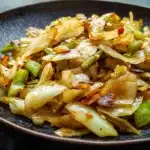
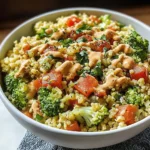
- Pair with steamed or stir-fried broccoli florets. The slight bitterness and crunch of broccoli beautifully contrast the sweet and sticky chicken.
- Healthier Options:
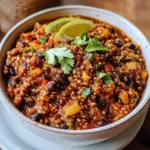
- Serve over quinoa or brown rice for added fiber and nutrients.
- Pair with a side of roasted vegetables like bell peppers, onions, zucchini, or asparagus. Roasting brings out their natural sweetness, complementing the dish.
- Serve alongside steamed bok choy or snow peas for a lighter, Asian-inspired meal.
- Noodle Night:
- Toss the chicken and sauce with cooked egg noodles, ramen noodles, or even spaghetti for a fusion twist.
- Serve over rice noodles for a gluten-free noodle option.
- Low-Carb Variations:
- Serve over cauliflower rice.
- Pair with zucchini noodles (zoodles).
- Serve alongside a simple cucumber salad or a mixed green salad with a light vinaigrette.
- Presentation Boosters:
- Always garnish! Sprinkle generously with toasted sesame seeds for nutty flavor and texture.
- Add thinly sliced green onions (scallions), both the green and white parts, for a fresh, sharp bite and color contrast.
- A small sprinkle of extra red pepper flakes for those who like more heat.
No matter how you serve it, ensure you spoon plenty of that extra sticky sauce over the chicken and the base (rice, noodles, veggies).
Additional Tips for Perfect Honey Garlic Chicken
Unlock the full potential of this recipe with these eight valuable tips:
- Don’t Overcrowd the Pan: This is crucial for achieving nicely browned, slightly crispy chicken instead of steamed chicken. When searing the chicken pieces, make sure they are in a single layer with some space between them. Cook in batches if your skillet isn’t large enough. This allows moisture to evaporate quickly, promoting browning (Maillard reaction).
- Dry Your Chicken Thoroughly: Before coating the chicken in cornstarch, pat it extremely dry with paper towels. Excess moisture hinders browning and can make the coating gummy. Drier chicken = better sear = better texture.
- Control the Stickiness: The cornstarch slurry is key to thickening the sauce. If your sauce isn’t getting sticky enough, ensure it’s simmering (not boiling vigorously) when you add the slurry. Let it cook for a full minute or two while whisking. If it’s still too thin, you can add a tiny bit more slurry (mix 1/2 tsp cornstarch with 1 tsp water), but be cautious – it thickens more as it cools slightly.
- Adjust Sweetness and Savory Balance: Taste the sauce before adding the chicken back in. If it’s too sweet for your liking, add a tiny splash more rice vinegar or soy sauce. If it’s too salty or not sweet enough, a little extra honey can balance it. Remember that flavors concentrate as the sauce reduces.
- Use Fresh Garlic and Ginger: While garlic powder and ground ginger can work in a pinch, fresh aromatics make a world of difference in this recipe. The pungent bite of fresh minced garlic and the zesty warmth of fresh ginger are fundamental to the vibrant flavor profile. Invest the extra couple of minutes; it’s worth it.
- Chicken Thighs for the Win: While chicken breasts work, boneless, skinless chicken thighs are highly recommended. They have slightly more fat, which translates to more flavor and ensures the chicken stays incredibly tender and juicy, even if slightly overcooked. They are much more forgiving than breasts.
- Make Extra Sauce: Let’s be honest, the sauce is arguably the best part! Consider increasing the sauce ingredients by 50% (honey, soy sauce, vinegar, sesame oil, aromatics, and the thickening slurry accordingly) if you love extra sauce for drizzling over your rice or vegetables.
- Meal Prep Potential: This recipe reheats reasonably well. Cook the chicken and sauce completely. Store leftovers in an airtight container in the refrigerator for up to 3 days. Reheat gently in a skillet over medium-low heat or in the microwave. The sauce might thicken further upon cooling; you can add a splash of water or chicken broth when reheating to loosen it slightly if needed. You can also prep components ahead: cut the chicken, mince the garlic/ginger, and whisk together the sauce ingredients (except the slurry) and store separately in the fridge.
Frequently Asked Questions (FAQ)
Here are answers to common questions about making Sweet & Sticky Honey Garlic Chicken:
- Q: Can I use chicken breasts instead of thighs?
- A: Yes, you absolutely can use boneless, skinless chicken breasts. Cut them into uniform 1-inch pieces. Be mindful that chicken breasts cook faster and can dry out more easily than thighs. Sear them until just cooked through (165°F or 74°C internal temperature) and avoid overcooking when simmering them in the sauce at the end. Chicken thighs generally yield a more tender and flavorful result in this recipe.
- Q: How can I make this recipe gluten-free?
- A: It’s very easy to adapt this recipe for a gluten-free diet. Simply replace the regular soy sauce with Tamari (a Japanese soy sauce typically brewed without wheat) or liquid aminos/coconut aminos. Ensure your cornstarch is certified gluten-free if Celiac disease is a concern, though cornstarch itself is naturally gluten-free. All other standard ingredients are typically gluten-free, but always double-check labels.
- Q: Can I bake this chicken instead of pan-searing?
- A: Yes, you can bake it, although the texture will be slightly different (less crispy). Toss the chicken with cornstarch, salt, and pepper as directed. You could briefly sear it first for color, then transfer to a baking dish. Alternatively, skip searing, place coated chicken in a lightly greased baking dish. Whisk together all sauce ingredients (including aromatics, excluding the cornstarch slurry). Pour about half the sauce over the chicken. Bake at 400°F (200°C) for 15-20 minutes, or until cooked through. While the chicken bakes, simmer the remaining sauce on the stovetop, thicken it with the cornstarch slurry, and then toss the baked chicken in the thickened sauce before serving.
- Q: My sauce didn’t get sticky. What went wrong?
- A: Several factors could be at play. First, ensure you used the correct amount of cornstarch for the slurry and mixed it well with cold water before adding it to the simmering sauce. Adding slurry to boiling sauce or not mixing it well can cause clumps. Second, make sure the sauce simmers for 1-2 minutes after adding the slurry – this activates the cornstarch’s thickening power. Third, ensure your measurements for the liquid ingredients (honey, soy sauce, vinegar) were accurate; too much liquid will require more thickener. Finally, remember the sauce will continue to thicken slightly as it cools.
- Q: How do I store and reheat leftovers?
- A: Store leftover honey garlic chicken in an airtight container in the refrigerator for up to 3-4 days. For best results, reheat gently in a skillet over medium-low heat, adding a splash of water or chicken broth if the sauce has become too thick. You can also reheat it in the microwave, covered, using short intervals and stirring in between to prevent the chicken from becoming tough.
- Q: Can I freeze Sweet & Sticky Honey Garlic Chicken?
- A: Yes, you can freeze it, though the texture might change slightly upon thawing and reheating. Let the cooked chicken cool completely. Transfer it to a freezer-safe airtight container or heavy-duty freezer bag, removing as much air as possible. Freeze for up to 2-3 months. Thaw overnight in the refrigerator before reheating gently as described above. The sauce might separate slightly but should come back together upon heating and stirring.
- Q: Can I make this dish spicy?
- A: Absolutely! The recipe includes optional red pepper flakes for mild heat. To increase the spiciness, you can add more red pepper flakes, a pinch of cayenne pepper, a teaspoon or two of Sriracha, chili garlic sauce, or even some finely minced fresh chili pepper (like a Thai chili or serrano) sautéed along with the garlic. Adjust the amount to your heat preference.
- Q: What can I use if I don’t have rice vinegar?
- A: If you don’t have rice vinegar, you can substitute it with other mild vinegars. Apple cider vinegar is a good substitute, offering a slightly fruitier tang. White wine vinegar can also work. In a pinch, you could use fresh lemon juice or lime juice, which will provide acidity but alter the flavor profile slightly, giving it a brighter, citrusy note instead of the cleaner tang of rice vinegar. Start with a slightly smaller amount and adjust to taste.
Sweet & Sticky Honey Garlic Chicken
Ingredients
Here’s what you’ll need to create this irresistible honey garlic chicken:
- 1.5 lbs (about 680g) Boneless, Skinless Chicken Thighs: Cut into 1-inch bite-sized pieces. Thighs stay incredibly juicy and flavorful, perfect for this recipe. You can use chicken breasts, but thighs are recommended for tenderness.
- 2 Tablespoons Cornstarch (or Arrowroot Powder): For coating the chicken, creating a light crust that helps the sauce cling and adds a slight crispness.
- 1 Teaspoon Salt: Or to taste. Essential for seasoning the chicken properly.
- 1/2 Teaspoon Black Pepper: Freshly ground preferred for the best flavor.
- 2 Tablespoons Olive Oil (or Avocado Oil): For searing the chicken. Choose a neutral oil with a relatively high smoke point.
- 6–8 Cloves Garlic: Minced finely. Don’t skimp here; it’s key to the “garlic” part of honey garlic! Adjust based on your love for garlic.
- 1/2 Cup Honey: The star sweetener, providing that characteristic sticky sweetness. Use good quality liquid honey.
- 1/3 Cup Low-Sodium Soy Sauce (or Tamari for Gluten-Free): Provides the savory, umami base for the sauce. Low-sodium helps control the saltiness.
- 2 Tablespoons Rice Vinegar (or Apple Cider Vinegar): Adds a crucial tanginess to balance the sweetness of the honey and richness of the soy sauce.
- 1 Tablespoon Sesame Oil: Toasted sesame oil adds a wonderful nutty depth to the sauce. A little goes a long way.
- 1 Teaspoon Grated Fresh Ginger (Optional but Recommended): Adds a warm, zesty kick that complements the garlic beautifully.
- 1/4 Teaspoon Red Pepper Flakes (Optional): For a gentle background heat. Adjust to your spice preference or omit entirely.
- 1 Tablespoon Cornstarch (or Arrowroot Powder) mixed with 2 Tablespoons Water: This slurry is used to thicken the sauce to that perfect sticky consistency.
- Optional Garnishes: Toasted sesame seeds and thinly sliced green onions (scallions). These add visual appeal, texture, and fresh flavor.
Instructions
Follow these steps for perfectly sweet, sticky, and savory honey garlic chicken:
- Prepare the Chicken: Pat the cut chicken thigh pieces thoroughly dry with paper towels. This is crucial for getting a good sear. In a medium bowl, toss the chicken pieces with 2 tablespoons of cornstarch, 1 teaspoon of salt, and 1/2 teaspoon of black pepper until evenly coated. The cornstarch coating helps create a slightly crispy exterior and thickens the sauce later.
- Sear the Chicken: Heat the olive oil in a large skillet or wok over medium-high heat. Once the oil is shimmering hot (but not smoking), carefully add the coated chicken pieces in a single layer. Avoid overcrowding the pan; cook in batches if necessary. Cook for 3-5 minutes per side, undisturbed, until golden brown and cooked through. The internal temperature should reach 165°F (74°C). Once cooked, remove the chicken from the skillet and set it aside on a plate. Don’t clean the skillet yet – those browned bits add flavor!
- Sauté Aromatics: Reduce the heat to medium. Add the minced garlic (and grated ginger, if using) to the same skillet. Sauté for about 30-60 seconds until fragrant. Be very careful not to burn the garlic, as it will turn bitter. Stir constantly.
- Create the Sauce Base: Pour the honey, low-sodium soy sauce, rice vinegar, and sesame oil into the skillet. Add the red pepper flakes, if using. Whisk everything together, scraping up any browned bits (fond) from the bottom of the pan – this adds immense flavor to the sauce.
- Simmer the Sauce: Bring the sauce mixture to a gentle simmer over medium heat. Let it bubble gently for 2-3 minutes, allowing the flavors to meld together.
- Thicken the Sauce: In a small bowl, whisk together the remaining 1 tablespoon of cornstarch and 2 tablespoons of water until smooth, creating a slurry. Pour the slurry into the simmering sauce while whisking constantly. Continue to cook and whisk for another 1-2 minutes, or until the sauce has thickened to a syrupy, glossy consistency that coats the back of a spoon. It should be visibly sticky.
- Combine Chicken and Sauce: Return the cooked chicken pieces (and any accumulated juices from the plate) back to the skillet with the thickened sauce. Toss gently to coat every piece thoroughly in the glorious honey garlic glaze. Let it simmer for another minute or two, allowing the chicken to reheat and fully absorb the sauce’s flavor.
- Serve: Remove the skillet from the heat. Your Sweet & Sticky Honey Garlic Chicken is ready! Garnish generously with toasted sesame seeds and sliced green onions, if desired, before serving immediately.
Nutrition
- Serving Size: one normal portion
- Calories: 550
- Sugar: 25g
- Sodium: 1000mg
- Fat: 25g
- Carbohydrates: 40g
- Protein: 40g